
Taking a patient’s shade is very much an art form and we
want to help make this process as accurate and easy as possible.
* Take the shade before prepping the teeth – they become
dehydrated with the mouth open
* Use color corrected lighting 5500 Kelvin and use a shade
light – adDent Rite-Lite 2
* If the patient is bleaching, wait one week to take the
shade – shade will relapse a little
* Please take photos with shade tabs at the same distance
and angle as the teeth
* When taking the shade, do it within 10 seconds – your eyes become fatigued and need a break to recharge the cones and rods of your eyes – look at blue or gray. Eyes have 2 main photo receptors, Rods and Cones. We have around 120 million Rods and around 7 million Cones in our eyes. Rods focus on Value and Cones on Color (Hue and Chroma)
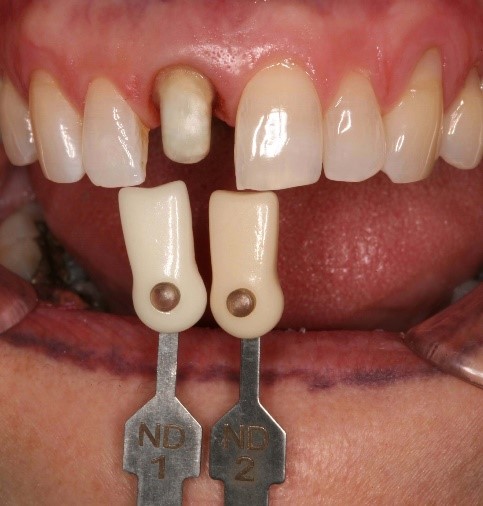
* When taking a shade, the most important thing is the Value – it represents, the optical brightness of the tooth – focus on the incisal, and middle 1/3 – look at incisal of tab to incisal of tooth – see photo 1
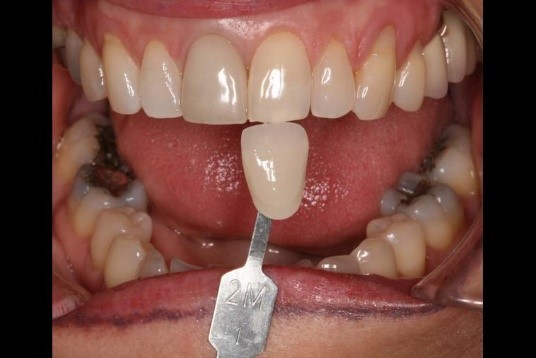
* Next, focus on the Hue – the shade range of the tooth – like A shades or D shades – focus on the middle and gingival 1/3 of the tooth – have gingival of tab turned to incisal of tooth – see photo 2
-
Shade Photo 2
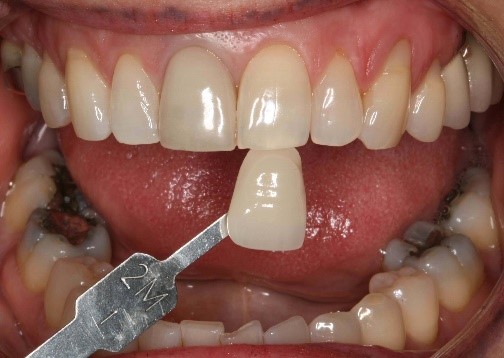
* Last, focus on Chroma – intensity of color like A1, A2, A3 etc.- focus on middle and gingival 1/3 of tooth – have the gingival of tab turned to incisal of tooth – see photo above * Please take a photo of the prepped tooth and take a shade with the Ivoclar stump guide or Vita guide – underlying shade will affect the final shade of the restoration – see photo 3